For beginners, please read the instructions on how to ฺBuild Machine Learning Model first.
1.Once the user has selected a model, they will proceed to the training process of the model as shown in the diagram.
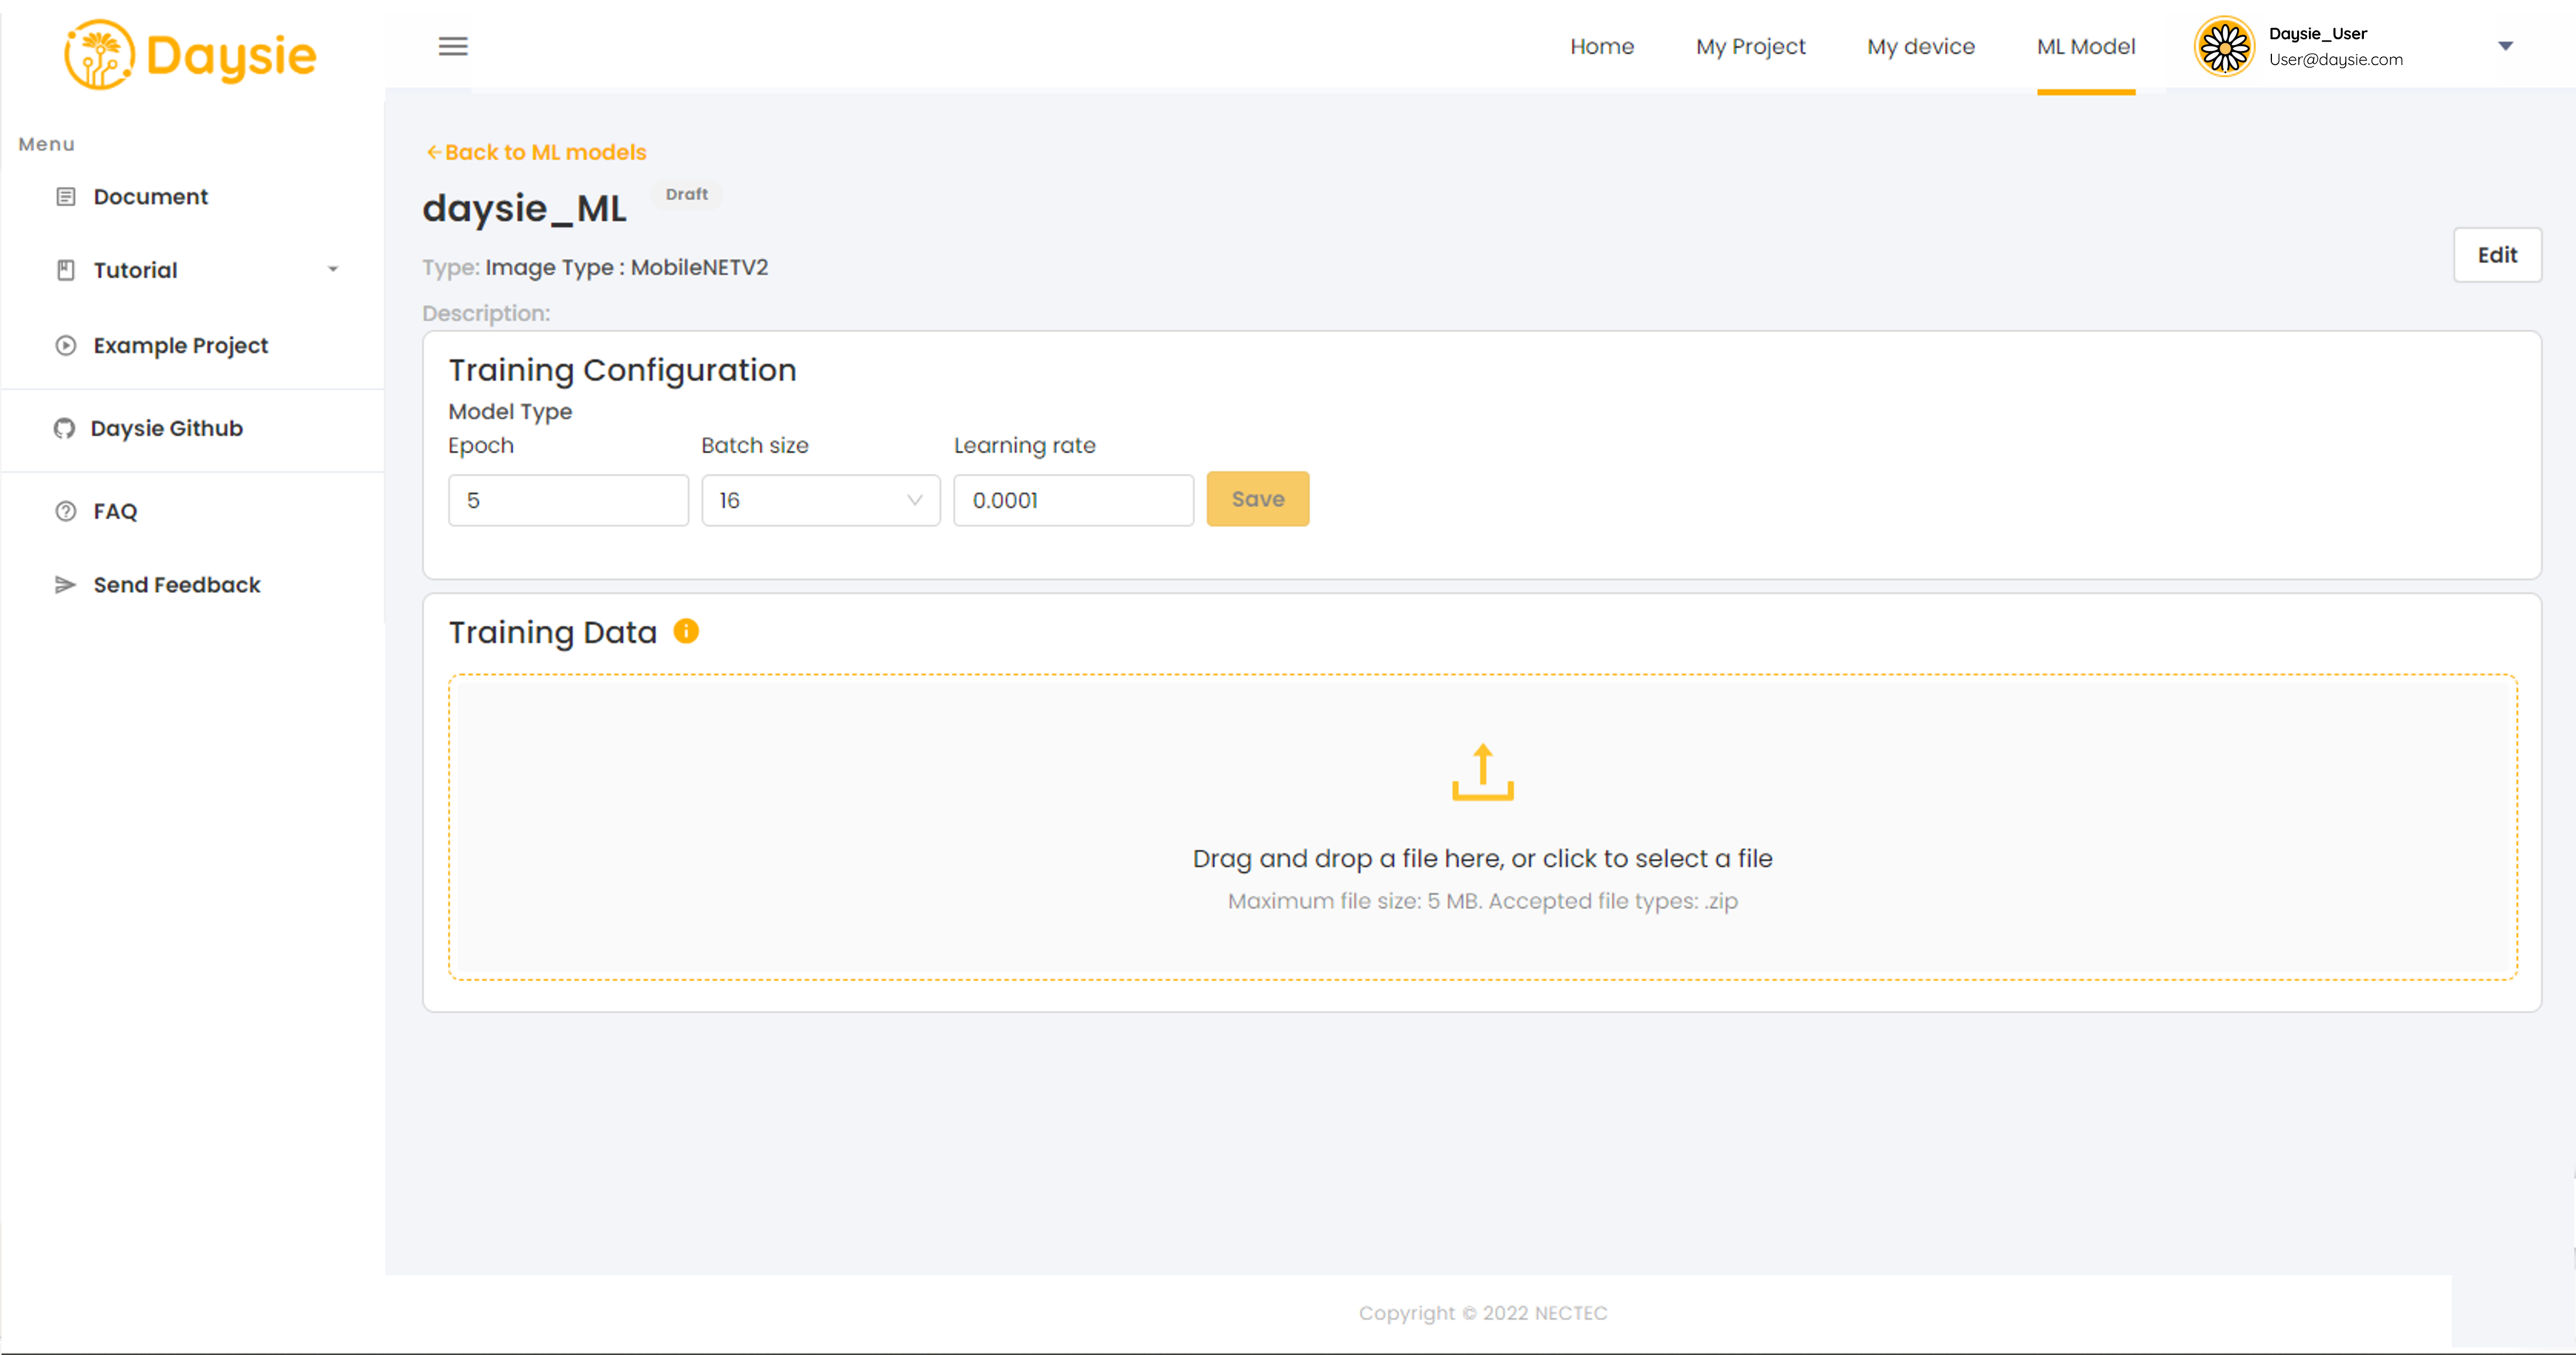
Setting hyperparameters for training an ML model in the Training Configuration section includes Epochs, Batch size, and Learning rate. Users can save these settings or choose to use default values already set for each model.
2.Importing a dataset for training the model allows users to click on the empty area to select files from their computer or drag and drop files into the space to upload data.

Select the data file to use for training the model, ensuring it is in ZIP or RAR format, then click OK.
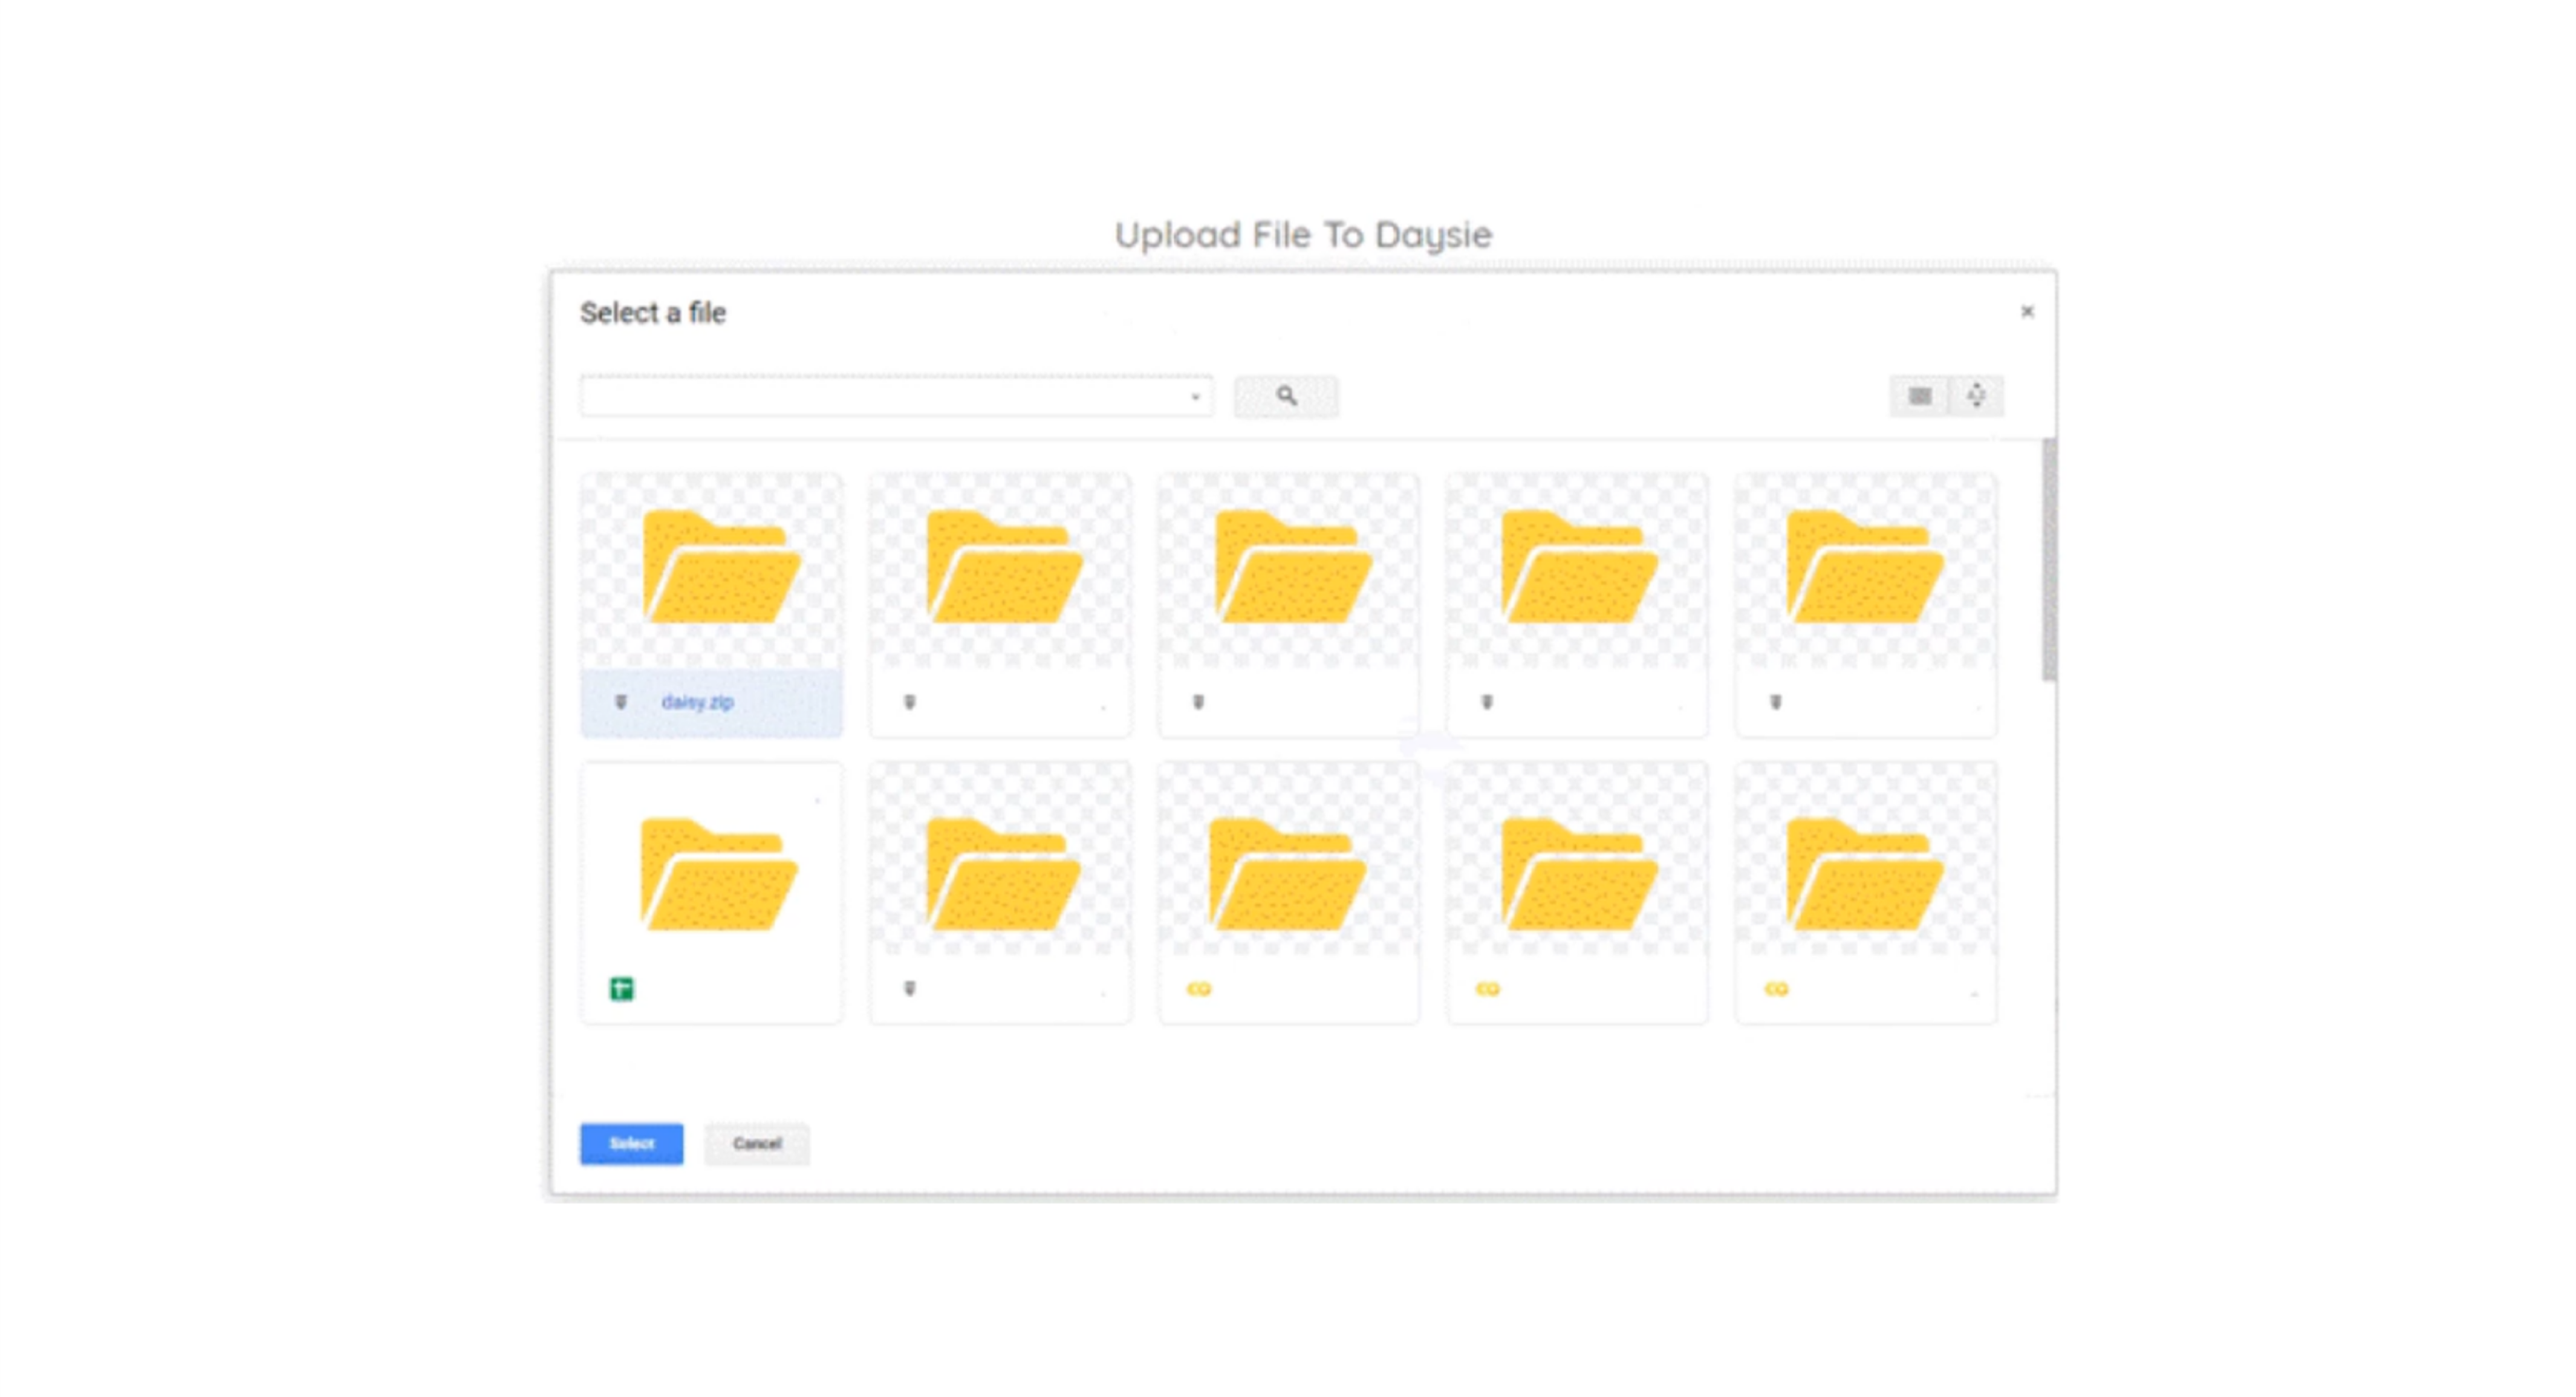
Users must follow the instructions carefully for preparing data files for each type of model and strictly adhere to them. If the files are not in the correct format, the system will be unable to train the model.
4.Once the file selection is successful, users will return to the model training window where the selected file name will appear on the screen. If correct, they can click the “LET’S TRAIN” button to start model training. If the selected file is not a .zip file, users will not be able to click the “LET’S TRAIN” button to initiate model training. They will need to select a new file (returning to step 3).
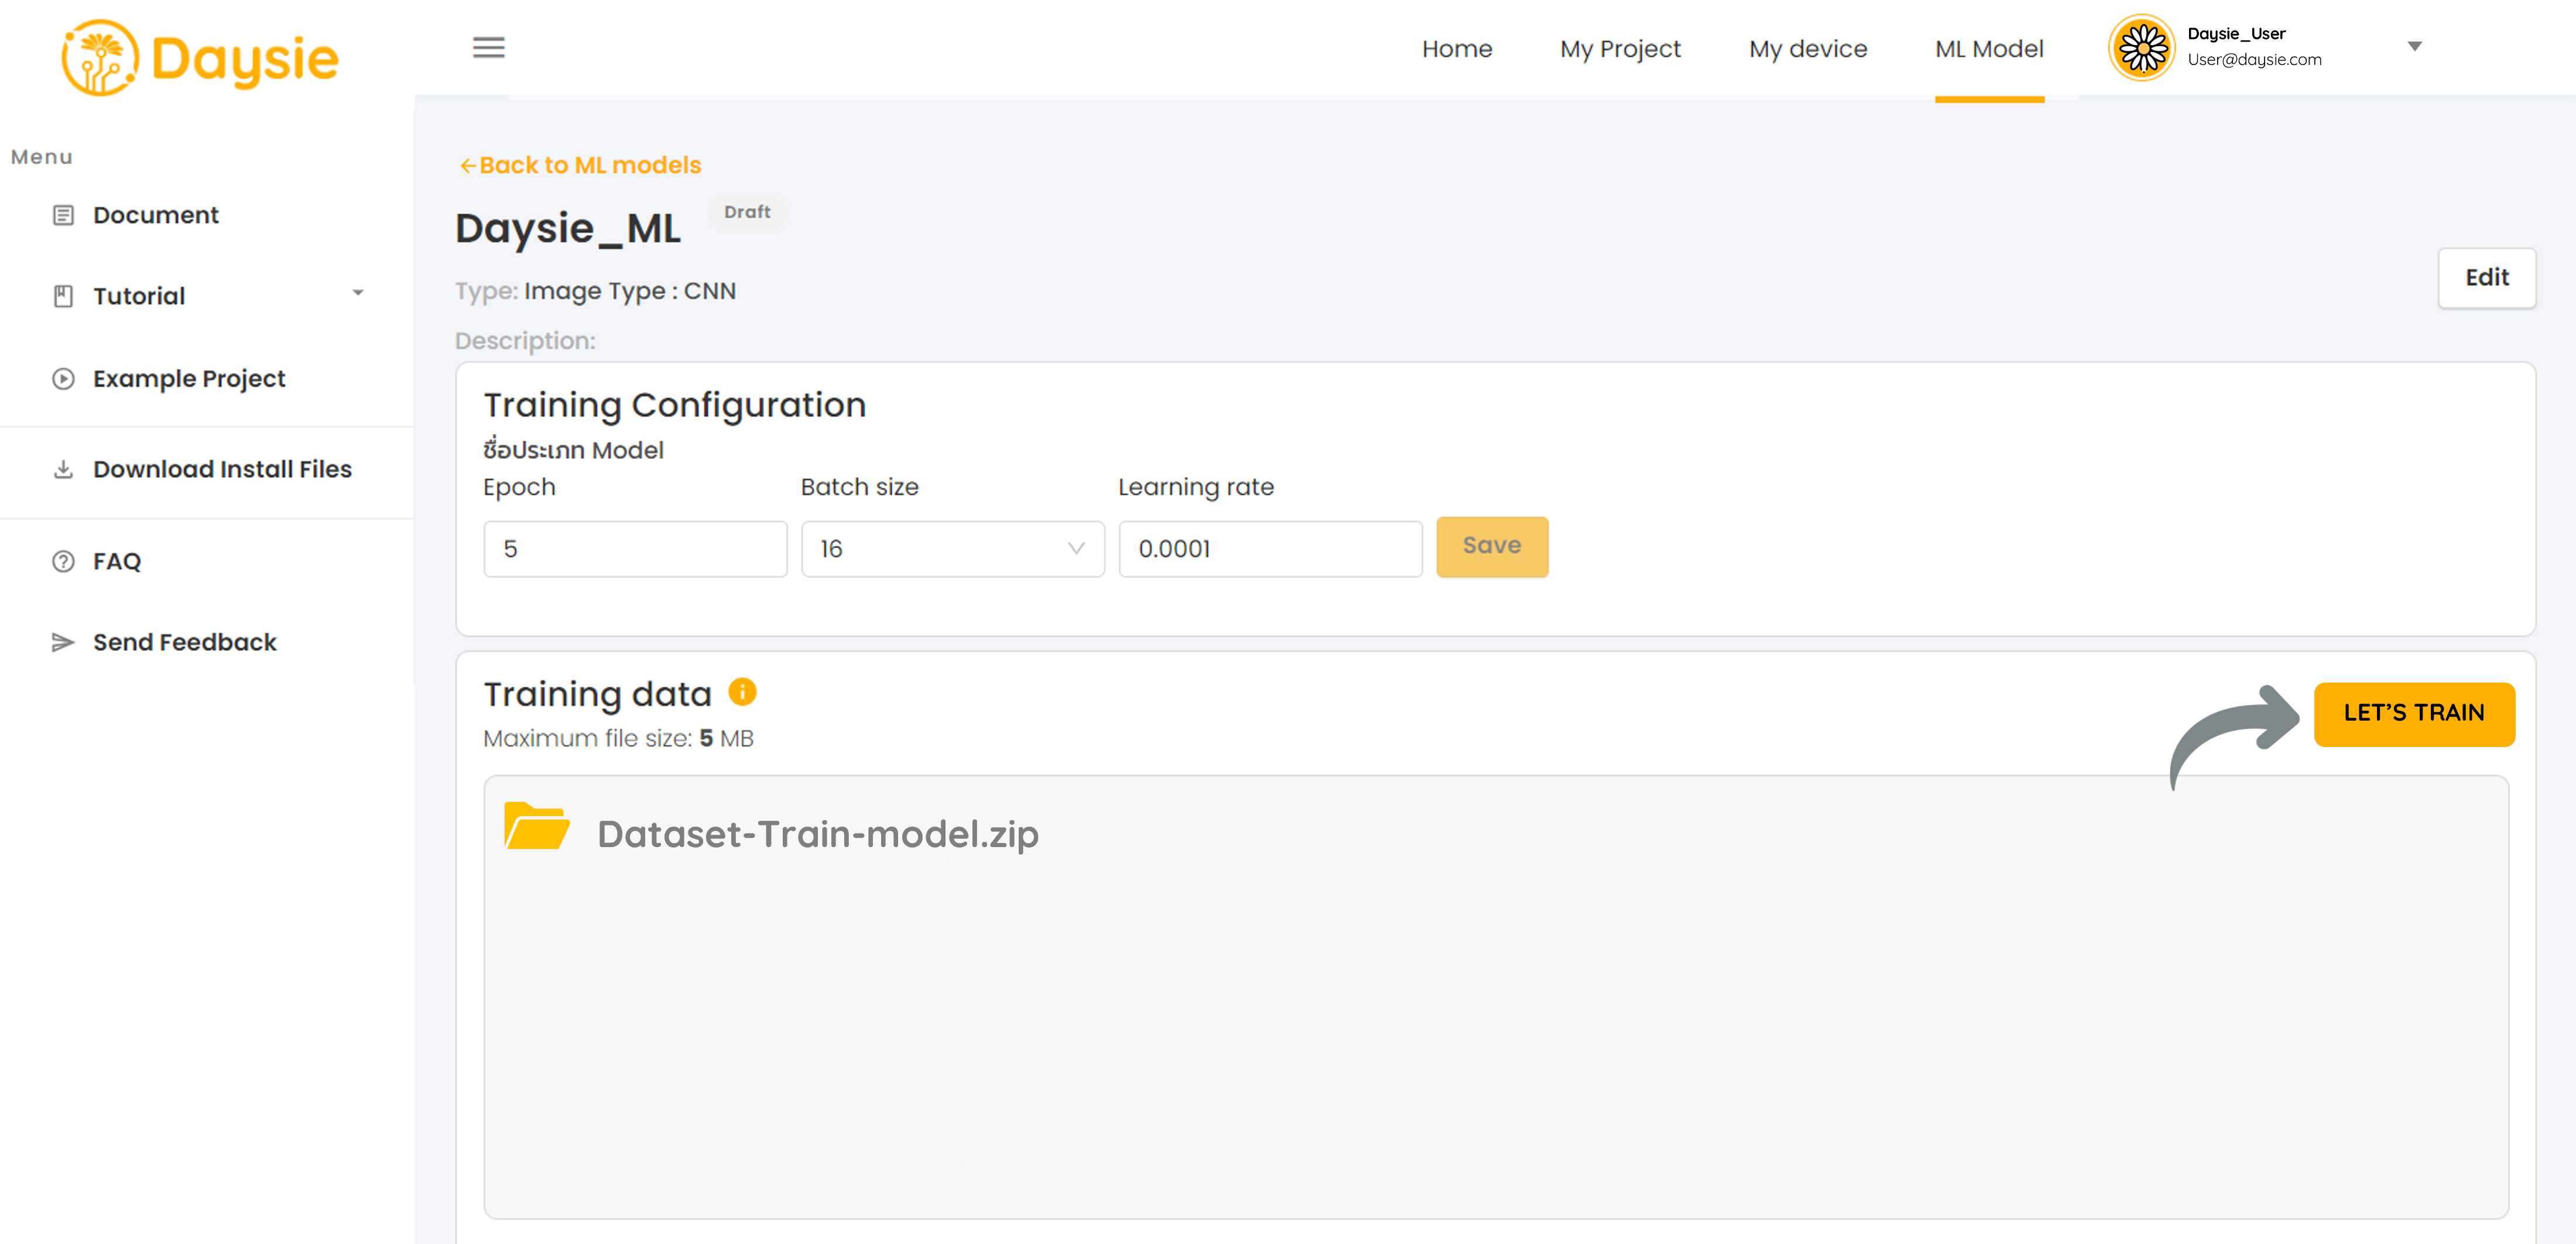
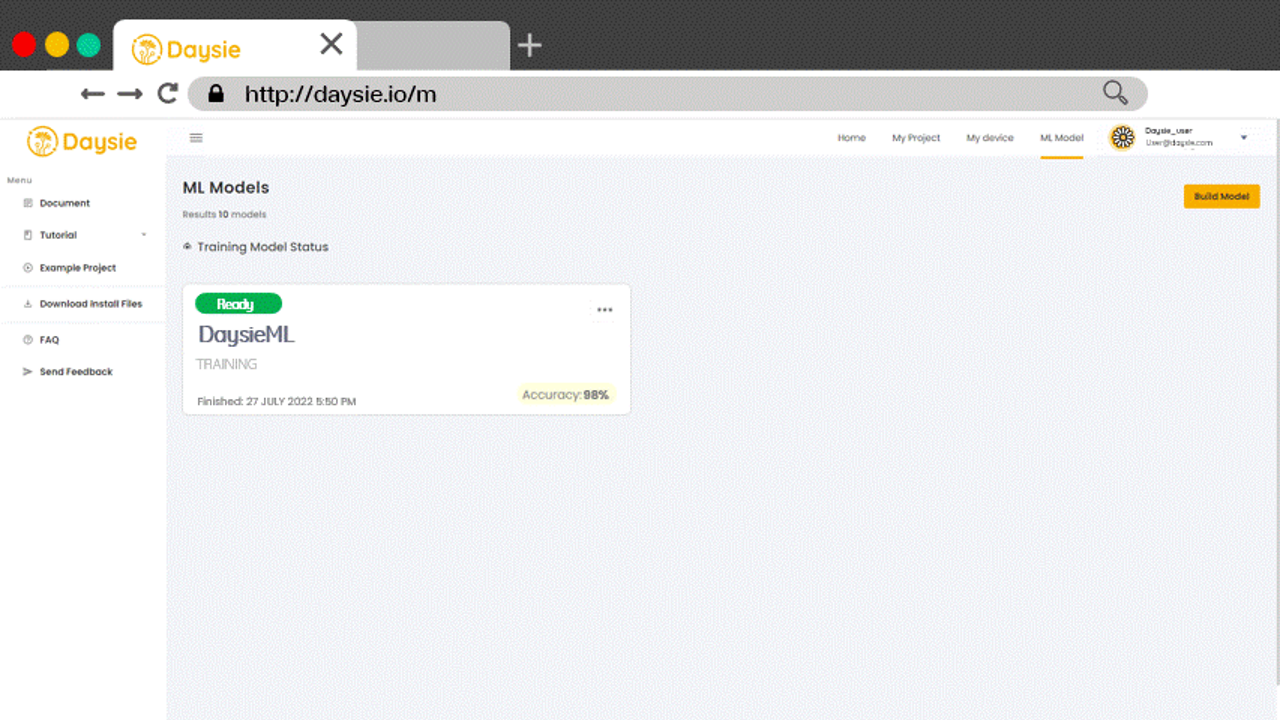
- When the user clicks “LET’S TRAIN” successfully, the model will enter different status phases:
- Uploading: System is importing data files from Google Drive.
- Queuing: Waiting in line to start model training.
- Training: System is actively training the model.
- Ready: Model training is complete.
Additionally, there are error statuses that may occur:
- Upload Failed: System failed to import files from Google Drive. This error can result from various issues such as connection loss or oversized files.
- Train Failed: System failed to train the model. This error can result from issues such as incorrect file formats or incorrect Hyperparameters settings.
6.Once the model status shows as “Ready,” users can test its accuracy by clicking on the “More Options” icon and selecting “Test.”
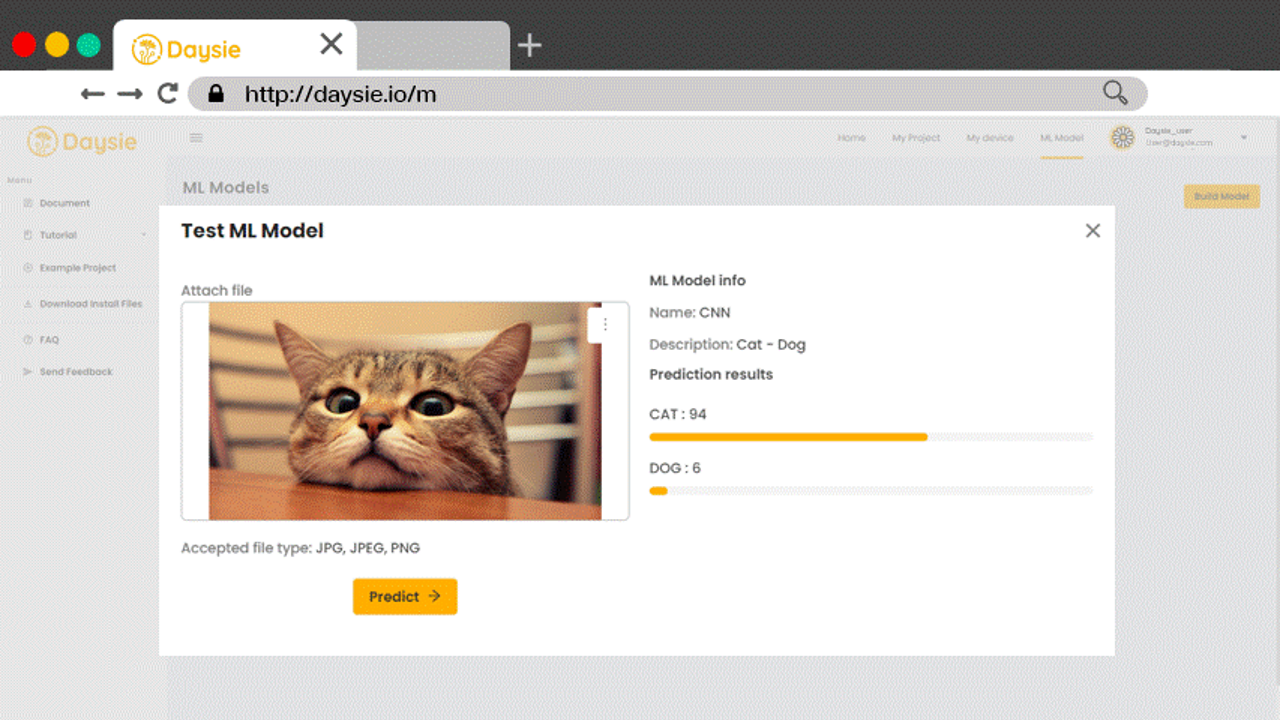
In the Test ML Model window, users can import test data files such as images or audio files by dragging and dropping them or clicking “Browse file” from their computer. Afterward, they can click the “Predict” button, and the model’s predictions will be displayed on the right side of the window.ง
If the training result is not satisfactory the first time around, you may retrain the model again using a new dataset by following these steps:
- Select “ML Model” on the top navigation bar. Click on the More Options icon of the model to be retrained and choose “Configure/Train”.

2.You may change the hyperparameter setting in the “Training Configuration” box then click “Save” to apply the new setting or keep the previous values.

3. Importing a dataset for training the model allows users to click on the empty area to select files from their computer or drag and drop files into the space to upload data.

4.Select the data file to use for training the model, ensuring it is in ZIP or RAR format, then click OK.

Read and follow the training dataset file preparation guideline for each type of model. If your data file is not of the right format, the system will not be able to train the model.
5.Back at the model training page, confirm the selected file shown is correct and click “LET’S TRAIN” to start training. In the case that the file is not a .zip, .7z, or .rar file, the system will not allow you to proceed and you will have to reselect a file by clicking “Upload file”.

6. When the model status turns “Ready”, the final training accuracy will be shown on the model card. You can test the model’s prediction accuracy by clicking on the More Options icon and choosing the “Test” command.

7. In the “Test ML Model” window, import a test data file consisting of a single observation, e.g., a picture file, an audio file. Then click “Predict”. The prediction result will appear on the right hand side of the window8..

The newly retrained model will be saved over the previous model. If the old model is included in any recipe, the model in the recipe will change to the retrained one automatically as well.